Updating the countertops in a home is a great way to freshen and liven up a space without having to deal with a full-blown restoration. It’s a great way to add value to a kitchen or bathroom as well, especially if you are looking to put the home on the market soon.
Countertops come in a variety of styles, colors, and sizes and are often seen in four main materials:
- Granite
- Quartz
- Other types of natural stone (soapstone, onyx, etc.)
- Other types of specialty stone (exotic granite, marble, etc.)
There are also wooden, stainless steel, and even concrete countertop options that are seen in restaurants, commercial kitchens, bars, and game halls.
If you are interested in a new countertop project, our team has put together a guide of what to expect with the installation:
- Designing
- Measuring
- Cutting
- Preparing
- Removing
- Fitting
- Securing
- Installing additional components
- Sealing
- Hooking up appliances
Designing
Perhaps it’s the case that the design element has already been finalized if you’re ready to dive into the installation, but just in case, this is an important component to launch the process. Designing your new countertops is not just about the look and feel of the space or the countertop material/color you chose. It’s about ensuring your space has all the countertop surfaces you want.
In many countertop projects, old countertops are removed, and new ones are replaced in the same location. However, let’s think about that. Maybe you want to add a new island to your space? Or perhaps expand your current counter length? It’s important to think through additional construction or structural reinforcement needed. For example, let’s say you want to replace old laminate countertops with beautiful new granite — are your current counters able to handle the heavier countertop material?
All of this can be discussed during the design and planning phase.
Measuring
After a final decision on the design, materials, and total surface area needed for the new countertops, the space needs to be completely measured. Countertops need to be measured specifically for your space, including every corner, every turn, and every section, short and long.
In addition, overhang measurements will also be taken into consideration.
Cutting
The cutting step is just as it sounds. It is when the material is actually cut down specifically to size based on the measurements taken in the step above. Some cuts will result in longer pieces, and others will be extremely detailed to account for things like sinks and appliances like stoves that are a part of the larger design.
Depending on the material and the level of meticulous measurements, precise cutting can take some time.
Preparing
Before the old countertop can be removed, some preparation needs to happen in the space. Installing a countertop is an invasive construction project, so adjustments are needed for the day-to-day operation and function of the space.
In a kitchen, for example, the water source needs to be temporarily disconnected, and all appliances need to be removed from the working area.
Many times when a countertop is being replaced, other components like the backsplash are also replaced to ensure they match and there is consistency in materials. Old backsplashes should also be removed during this phase.
Removing
Once the space is prepped, the old countertop can be removed. Depending on the installation, this might involve removing some bolts and screws or even scraping off silicone adhesive. The pieces of the countertops will be lifted off and removed. If you work with a construction crew, they should dispose of everything properly.
Fitting
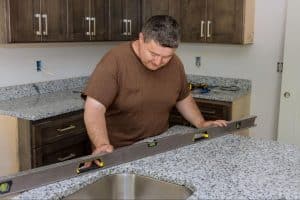
If everything was measured and cut correctly, the fitting step should hopefully be easy. This step involves laying out the new countertop pieces exactly as planned to ensure everything fits properly. If not, additional measuring and cutting will be needed.
Securing
Securing your new countertops involves physically attaching them to the frame component of your larger counter structure. The method of securing the countertop can vary based on material, but this usually involves an adhesive, bolts and screws, and caulk to fill any gaps.
Installing Additional Components
If your new countertop installation involves replacing a backsplash in a kitchen, this is completed in this step before sealing and moving appliances back.
Sealing
If your new countertop is quartz, granite, or another type of stone, sealing is the final touch before your space can be operational again. Sealing your new countertops ensures they are protected and finished.
A counter sealant is a solution that is absorbed into the countertop material to make it more scratch and stain-resistant. It also enhances the look of the stone, making it smooth, bright, and clean.
Hooking Up Appliances
Now that your countertops are installed and sealed, the last piece of the puzzle is to put everything that you removed back. You can reconnect all your appliances, turn the water back on, and enjoy your new space!
Supplying All of the Dallas–Fort Worth Area!
Wholesale Granite Direct has been voted the #1 Flooring and Granite Store in Arlington, and we offer the finest selection of countertop materials throughout the DFW Metroplex! We specialize in kitchen countertops, bathroom projects, backsplash designs, showers, fireplaces, and even flooring, offering wholesale prices on our products.
We’ve been in this industry for over twenty years and cannot wait to help make your new home project a reality! Give us a call, stop by one of our showrooms in Arlington or Granbury, or contact us via our online form.

